Etched Glass Captured Snowman Ornament

Materials:
Glass ball ornament
Makin’s Clay® - White
- Snowman Clay Cutter Set
- Texture Sheet Set
- Ultimate Clay Machine™
- Cutting Mat
etchall® - etching creme
- Etchmask®
Spellbinders™ - Artisan X-Plorer™
- Snowflake Dies
DecoArt® Americana® Multi-Surface Satin™ - Paprika, Dark Scarlet, Black
Fine paintbrushes
Beacon® 3-in-1 Adhesive
JudiKins™- Diamond Glaze™
- Clear/white Roxs™
- Snappy Tray™
- Snappy Tray™
Ribbons - white, light blue, silver
Tweezers, scissors
Want to try etchall® yourself? Follow this link and enter the code CINDIBG at checkout to receive 10% off your order!
Instructions:
Roll white Makin’s Clay® in Ultimate Clay Machine™ starting on setting #1, then #2,
finishing on #3.
 Place on cutting mat. Apply texture with snowflake texture sheet.
Use largest size snowman cutter to cut snowman from textured clay.
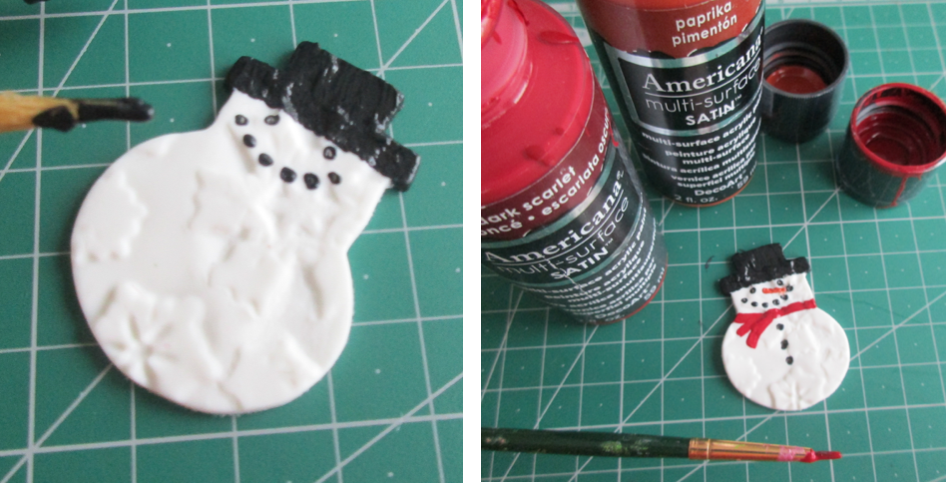
Multi-Surface Satin™ paints to add hat scarf, buttons, eyes, nose and mouth to snowman. Let dry 24 hours.
Makin’s Clay® remains lightweight and flexible after drying so it’s easy to bend your snowman to make him fit inside the ornament. The slightly curved shape after he is set in place adds to the dimensional feel of the finished ornament.

Use tweezers to insert snowman into glass ball into adhesive. Leave tweezers in place to hold snowman up while the glue dries.
Use Spellbinders™ Artisan X-Plorer™ and snowflake dies to
cut snowflakes from Etchmask®. Set snowflakes aside for another project - you are using the negative space as a stencil for your etching.

Place snowflake “stencils” onto glass ball.
Apply etchall® creme to snowflakes with small brush. Let set 15 minutes. Return creme to bottle and carefully wash ornament to remove remaining creme. Remove Etchmask.
Pour Roxs™ into Snappy Tray™, Pour about 1/4” inside ornament so snowman is sitting in a snow pile.
Apply Diamond Glaze™ to bottom of ornament, dip into clear glass Roxs. Let dry.
Add ribbon hanger and bow to top of ornament.


Comments
Post a Comment