Faux "Delft" Technique
As National Craft Month marches on, I am inspired to share many of my favorite techniques and projects with everyone!
I love old china dishes – especially anything blue and white. I’m drawn to the beautiful Delft blue patterns found on a variety of pieces ranging from tiles to teacups and have amassed quite a collection over the years. This was my inspiration for the creation of this “Faux Delft” technique I discovered last year and shared as one of Cindi's Simple Solutions on the When Creativity Knocks site.
I love old china dishes – especially anything blue and white. I’m drawn to the beautiful Delft blue patterns found on a variety of pieces ranging from tiles to teacups and have amassed quite a collection over the years. This was my inspiration for the creation of this “Faux Delft” technique I discovered last year and shared as one of Cindi's Simple Solutions on the When Creativity Knocks site.
To learn more about the history of Delft Blue china visit: http://www.holland.nl/uk/holland/sights/delftblue-history.html
 My version is quite simple – yet it gives you the feeling of Delft china. It requires just a few products.
White Makin’s Clay®, a blue inkpad (I prefer chalk as they give a softer effect, more like true Delft), a rubber stamp, and EarthSafe Finishes Marine Varnish.
A Sizzix Scoreboards Teacup Die designed by Eileen Hull serves as the base for my Delft technique project – but it would work on clay sheets, clay mounted onto wood or any other surface. Makin’s Clay® air dries so you don’t have to worry about discoloration in the baking process, and it is flexible when dry so you could make up sheets of this faux Delft and then mount it to any surface, even a curved surface.
I began by rolling out a small amount of White Makin’s Clay® using the Makin’s Professional® Ultimate Clay Machine set on #5 (very thin).

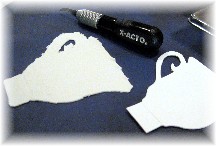
I then placed the die cut teacup onto the clay sheet and cut around it with an X-Acto craft knife. A small amount of Elmer's Craft Bond Adhesive tacky glue was placed over the teacup and the clay cut outs were placed onto the mattboard pieces while wet. The edges were gently smoothed by hand. The stamp was then inked with deep blue chalk ink and stamped onto the wet clay. The clay was allowed to dry according to manufacturer instructions (a few hours when used this thin), and the teacup die was assembled according to the manufacturer instructions.
Here’s an original piece of Delft which shows how it is often “blurred” yet still beautiful! |
A plastic lunch bag was filled with potting soil and the top portion approximately ½” above the soil was cut off. A
flowering annual plant was placed into the bag of soil, which was then placed into the teacup.
flowering annual plant was placed into the bag of soil, which was then placed into the teacup.
A bit of wide satin blue ribbon tied to the handle of the cup front, and the tag stamped with “We Love You” finished off this special "card" which would be great for Mother's Day, a birthday, to say thank you to a special friend, or to share get well wishes.


Really cool technique. Loved how you used the Sizzix tea cup die. I love that one
ReplyDeletewww.mel-designs.typepad.com
Super cool!
ReplyDeleteLOVELY! I also collect delft blue china :o)
ReplyDelete