Customized Etched Glass Vintage Door

What’s a girl to do when she wants to help a friend etch a door for their bathroom, yet she don’t have a die cutter to cut lettering large enough from etchmask®? Why use old fashioned stencils and resist gel, of course!
Materials:
etchall® Etching Creme
etchall® Resist Gel
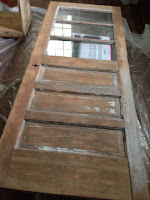
Vintage door with glass panel(s)
Alphabet stencils in choice of font
Large squeegee
Fine paintbrush
Instructions:
Photos of the process were taken with a telephone, and some were not clear enough to share - but it's pretty self-explanatory!
Wash and dry both sides of glass panel(s) on door.
Select stencil lettering to spell out desired word, using ruler to determine appropriate spacing of your lettering.


Turn over door. Use etchall® Resist Gel to fill in each letter. The bottle has a fine tip applicator, but I used a fine paintbrush to spread it out a bit within each letter after applying. Let resist gel dry until completely clear.
Flip door over. Use Resist Gel to trace over the unetched lettering. Let resist gel dry until completely clear.


 Use a large squeegee to apply a thick, even coat of etchall® creme over the surface of the window over the lettering. Let set 15 minutes. Return creme to bottle and clean window.
Remove the resist gel if it has not come free when you are washing the window after etching.
We wanted a very opaque etch as this was a bathroom door, so we also etched the opposite side of the glass.
Use a large squeegee to apply a thick, even coat of etchall® creme over the surface of the window over the lettering. Let set 15 minutes. Return creme to bottle and clean window.
Remove the resist gel if it has not come free when you are washing the window after etching.

If your door has additional panels, etch both sides of each additional panel.
Paint the door your desired color.
Voila! Customized, frosted glass door!


Your Blogs are awesome. I'm amazed that i could find it on internet.
ReplyDeleteSliding Patio Door Repair
Glass Sliding Door Replacement