Faux Vintage Crate Sign
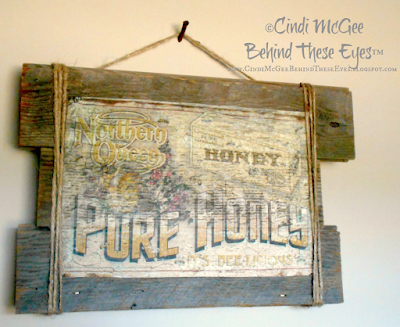
I love vintage crates. They are great to store things in, and fit in well with the overall casual, country feel of our decor. Sometimes a crate is too damaged to be used for storing, etc., but still has a fabulous vintage label on it, so we will cut the side with the label off the crate and use it as a decorative sign. In this case, I wanted something unique to display in our “bee themed” guest bathroom. I had already made decorative bee and honeycomb soaps to display, embellished the shower curtain with bee and honeycomb printed burlap, and made a window valance with the same burlap. But something was missing. I saw this vintage reproduction image online and loved it, but wanted to see if I could do something unique with it. After a bit of experimentation - this Faux Vintage Crate Sign was complete!
Materials:
Digital image
Computer & ink jet printer
Craft Attitude® Printable Craft Film
Craft Attitude® Printable Craft Film
DecoArt® Americana® Decor™ Chalky Finish Paint - Lace
Large paintbrush
Wooden “sign” in desired size made of aged pallet wood (or aged wooden fence boards - that’s what I used!)
Jute
Elmers® Craft Bond® Spray Adhesive
Instructions:
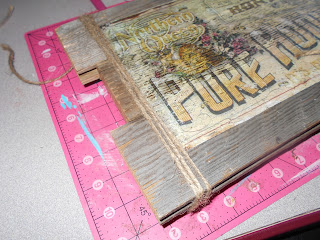
My husband and I made a simple sign from old fence boards for the base of my project. I wanted it to look like the side of a crate, with uneven edges, etc. He simply cut three boards to length, and two more boards for the back. The back boards were nailed vertically to the front horizontal boards to make the sign sturdy and so it would extend off the wall a bit more.
Find your desired image online. Size as desired. MAKE A REVERSE/MIRROR IMAGE - otherwise your text will be backwards when you are finished. Follow manufacturer’s instructions to print onto Craft Attitude® Film.
My first attempt was to simply follow the manufacturer instructions and apply glue from a glue stick and apply the printed image to the boards, but it just did not stand out - the text and colors of my image blended too much with the wood background.
What happened next was a delightful surprise. I peeled the image off before the glue dried. I decided to try painting the back of the printed image to make it more visable. I didn’t want a solid coat of paint, just a rough coat so it would be darker in some areas than others, and I wanted a very matte finish. I used “Lace” Chalky Finish paint and lightly applied it with a large paintbrush (I applied it right over the glue from the glue stick). Almost immediately I noticed a bit of magic happening - the paint was getting a fabulous crackle effect - PERFECT for this sign!
Let the paint dry completely. Then spray with spray adhesive and apply to the sign.
It still needed a bit of detail/texture, so I wrapped jute around the outer sides and tied it off on the back.
I couldn't be happier with the finished sign. We hung it using an antique nail from an old tobacco barn. It's the perfect accent for the room!


Comments
Post a Comment