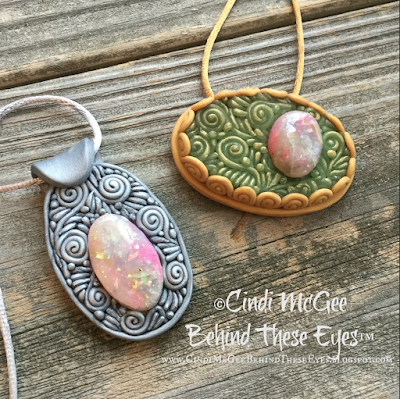
Faux Polymer Clay Opals - My Way
I have been having a wonderful time trying a huge variety of polymer clay techiques I’ve learned from polymer clay artists who share their tutorials on YouTube! Jessama Tutorials, Ludmila Bakulina, Patricia Roberts-Thompson..... and so many more! This version of faux opals is sort of a mix of things I learned from some of the other tutorials for faux opal both on YouTube and on various websites. I combined bits of this and bits of that and found what worked for me.
Materials:
premo! Sculpey® Accents - Opal
Alcohol inks - Wild Plum, Denim, Pesto (or colors of your choice)
Clay blade
Resin - I used UV curing resin (Optional)
Fine grit wet/dry sandpaper
Instructions:
How much clay you choose to tint will depend upon how many finished faux opals you wish to create. For this batch, I used about a 1/2 of a brick of clay.
You may wish to wear gloves for this technique as alcohol ink WILL stain your hands and fingernails (and clothing, and work surface…. so be prepared if you wish to avoid that. I don’t mind inky pinkies, so I just proceeded without gloves.)
 Divide one third of the opal clay into three pieces. Add 1-2 drops of alcohol inks, one color per piece of clay (Note - I recommend starting with ONE drop, then blending, and if you wish it to be a little darker, add another drop. You do NOT want very dark colored clay for this technique - less is more.…) I used WIld Plum, Denim, and Pesto - but you can certainly vary the colors if you wish.
Place tinted clay, AND a portion of untinted opal clay that is slightly larger (for example - if your colored clay is about dime sized, use a nickel sized portion of plain opal clay….), into the freezer and let them remain their for at least 30 minutes.
Remove frozen clay from freezer, and immediately use clay blade to begin chopping each color into small pieces as shown.
Use your fingers to gently mix the colors together and form a pile.
 Take a small portion of the pile, and gently begin compressing the clay pieces back together, and form into the desired shape for your cabachons. I chose to make ovals in various sizes.
Carefully smooth the surface of each to remove any fingerprints.
Make a bowl of ice water and set aside (I kept mine in the fridge until it was time for use!)
Bake, tented with foil, per manufacturer’s instructions. Upon removal from the oven, IMMEDIATELY drop into the ice water and let them set about 10 minutes.
Remove from water and dry. You may note that the chunky "glittery" pieces from the clay itself may be popping up here and there. At this point you can either sand your opals with fine grit wet/dry sandpaper and then polish with a cotton or denim cloth, or, you can apply resin. I chose to sand to smooth the surface and remove any extending pieces of the glitter, and then use a UV resin.
 My choice to use resin is what lead, quite by accident, to an effect that I really liked and thought made my opals look even more genuine. When I created the pendants I wanted to use the opals in, I added my opals and then baked the pendants. What resulted, when I “re-baked” the opals with the UV resin applied, was that the resin itself began to slightly crack.
If you sand and buff rather than applying resin, then I do not believe this cracking would take place when you re-bake them on a finished piece.
I've created three pendants so far with my faux opals, and still have several in my stash awaiting their destination projects!


Very nice, I like how the opals turned out.
ReplyDeleteQuestion, why did you set the cabochon on top of the base instead of setting it in it? I would like to learn how you made the bases at the top of the tutorial, they look like filigree.
Thank you, your awesome!
Hi Donna- I just now saw your comment I apologize for the delay in responding. I had no real set reason for setting the opals atop the bases, I just liked the way they looked. The bases with the filigree are a technique I learned as part of the 2018 Polymer Clay Adventure from Pritesh Dagur's workshop :)
Delete