Golden Diamonds Polymer Clay Pendants Tutorial

I recently shared my "Golden Diamonds" polymer clay pendants. Today I'm sharing the tutorial for how to create them. These pendants are now available in my Etsy store!
Materials:
premo! Sculpey® - White
premo! Sculpey® Accents - 18K Gold
Judikins™ Gel Du Soleil UV Resin
Judikins™ background rubber stamps -
- 2671 J • Harlequin Background
- 2424 J • Florentine Background
Gold leafing
Clay blade
Megallic gold permanent pigment inkpad
Diamond shaped clay cutters in graduated sizes ( I used a set of 4 graduated sizes)
Clay roller
UV light (optional)
Instructions:
Roll white clay to a little less than 1/4” thick. Ink harlequin background stamp with gold permanent pigment ink and stamp into rolled clay, pressing to transfer ink and the texture of the pattern into the fresh clay. Let the ink dry.


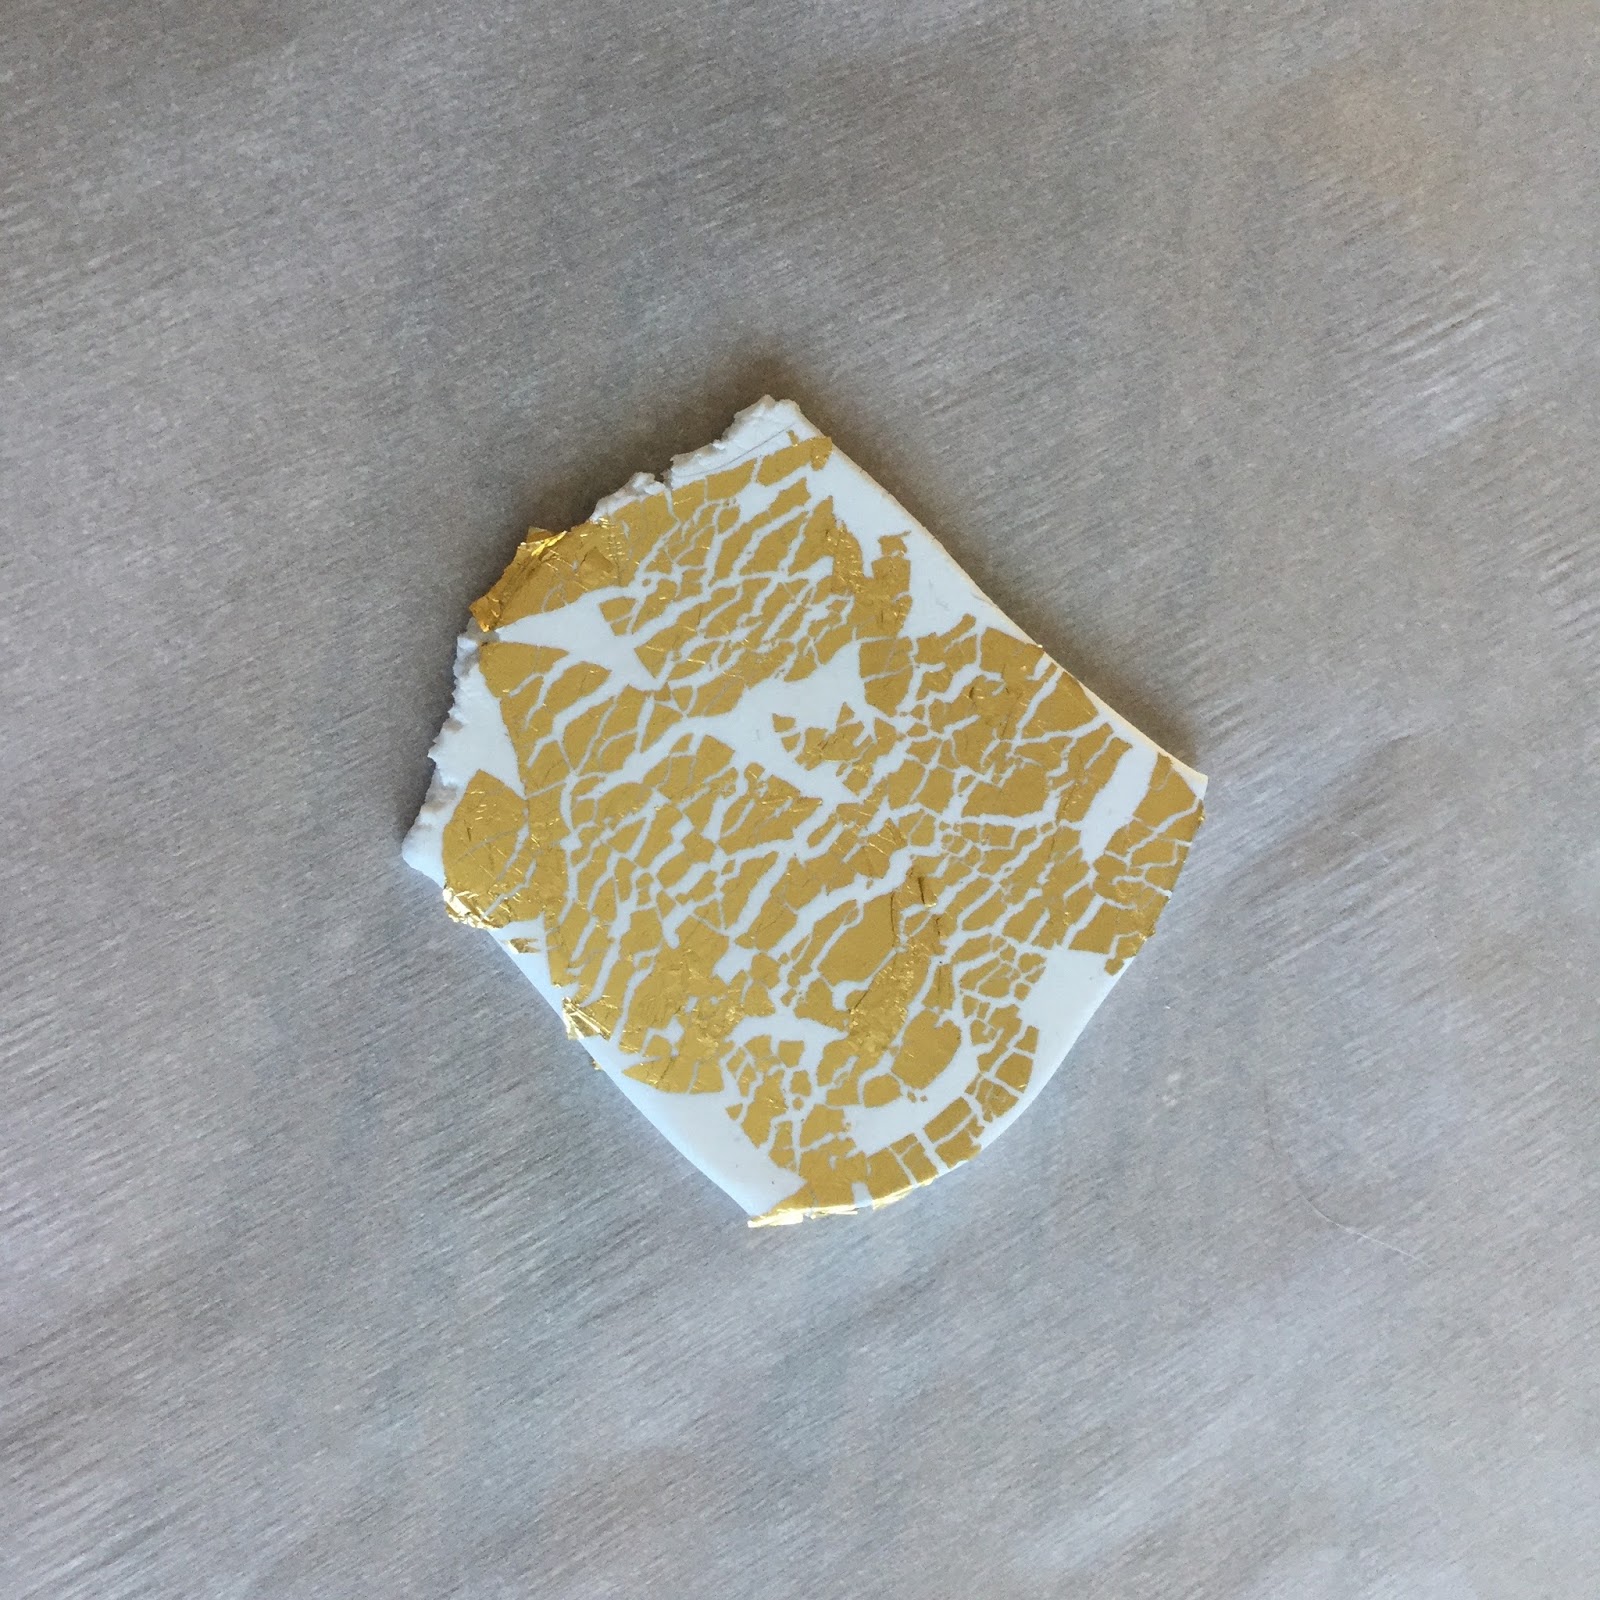
Roll additional white clay to slightly more than 1/4” thick. Apply gold leafing and roll again gently to spread and crackle the gold leafing as desired and reduce thickness to same as original piece.

Roll metallic gold clay to same thickness as white. Use uninked florentine background stamp and stamp into the clay to transfer the texture to the fresh clay.
Use clay blade to carefully remove thin slices from the top of the stamped clay until the surface is smooth again. Roll lightly to further smooth surface. (This is the mica shift technique.)


Roll additional gold metallic clay to about 1/4”. Impress with uninked florentine background stamp. For some of the pendants, I used smallest diamond to cut a diamond from the stamped clay.
Use largest diamond cutter to cut diamond from harlequin stamped clay. Use cutter to cut
away section from the diamond, from the center out to one side as shown.


Use cutter to cut diamond from metallic leaf crackled clay. Place this diamond into the space cut away from the harlequin diamond. Then use cutter to cut away a section of that piece as shown.


Use diamond to cut diamond from the metallic gold clay with the mica shift technique. Place this diamond into the space cut away from the leaf crackled clay.
Use cutter to then recut around original diamond to remove excess from second two
diamonds.


If you wish to vary your pendants as I did, determine what patterns you would like on your pendants and cut the necessary amount of diamonds, etc. for each.
For the two pendants with the raised diamonds in the center, I took scraps from the stamped white clay, metallic leafed white clay, and the mica shift metallic gold clay above and placed them next to each other and rolled gently to combine and create a veneer, then used the largest diamond cutter to cut a base for those pendants.
Use the clay blade to cut very thin strips (about 1/8” +/-) of the stamped clay. Apply the strips in sections to outline the pendants and each individual section of the pendants.
I used the smallest diamond cutter to cut small diamonds from the stamped metallic gold clay to place in the center of the two “solid” veneer diamonds.


I rolled all remaining scraps together and re-rolled the blended clay to about 1/8” and then used the largest diamond cutter to cut backing pieces for each pendant.
Add bake & bond and apply the backing. Trim as needed and use fingers to carefully wrap around the diamond and cover the sides up to the gold border pieces as shown.


Bake according to manufacturer instructions. Let cool.
Next, I applied a tiny amount of gold clay with my fingers to seal the joints where each border strip meets.
I also cut small rectangular sections from the gold stamped clay and rolled them to create tubes for bails. They were mounted to the backs of the pendants using bake & bond.


Bake again and let cool.
 Carefully fill each section of the diamonds with Gel Du Soleil UV resin. I did NOT coat my border pieces or the center stamped diamonds. Set in the bright sunlight for about 20 minutes to cure (or use a UV light and cure several minutes until set - time will vary with strength of UV light).
  Add gold satin cording.

Simply elegant!
ReplyDelete