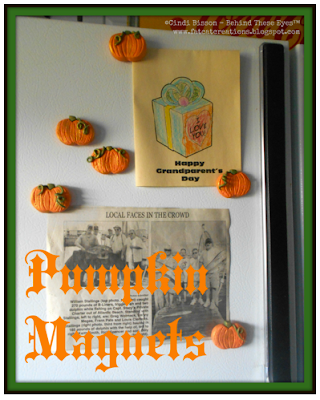
We’re all guilty of it – collecting bits of this and that on our refrigerators! Photos, school projects, newspaper articles, appointment reminders…Why not create some seasonal magnets to hold it all in place?
Materials:
- Makin’s Clay® – White, Olive Green
- Makin’s Clay® clay roller
- Makin’s® Professional™ Ultimate Clay Extruder
- Makin’s® Professional™ Clay Tools
- Makin’s® New Halloween Cutter Set – 37052
- DecoArt® Metallic Lustre – Gold
- Acyrlic Paint – Pumpkin Orange
- Westcott® Craft – Self-Healing Mat
- 3/4” Round magnets
- Beacon® Adhesives Tacky Glue
- Zip-lock bag
Instructions:
Custom mixing shades of Makin’s Clay is easy – whether you use their Clay Mixing Ruler, or acrlyic paint – a rainbow of shades can be achieved.
- Add approximately 1/2 teaspoon of Pumpkin orange acrylic paint to 60 grams of white clay.
- For easier, less messy, blending and mixing, place into zip lock bag. Massage to thoroughly mix paint into clay.
- Roll clay with hand roller to approximately 1/4” thick.
- Cut 6 pumpkins with pumpkin cutter.
- Roll olive green clay to approximately 1/4” thick. Using top of pumpkin cutter, cut 6 stem sections.
- Use blade to remove orange stem from each pumpkin. Use blade to cut green stem and mount to pumpkin.
- Use point tool on handle to draw “grooves” in each pumpkin. I allowed my grooves to be someone jagged and irregular rather than smooth lines.
- Fill Ultimate Clay Extruder with olive clay and very small hole disc. Extrude clay.
- Mount extruded clay to stem on each pumpkin, coiling some pieces to create vines.
- Use fingertip to apply Metallic Lustre to pumpkins. Let clay dry.
- Mount magnets to back of each pumpkin with Beacon Tacky Glue.


Comments
Post a Comment