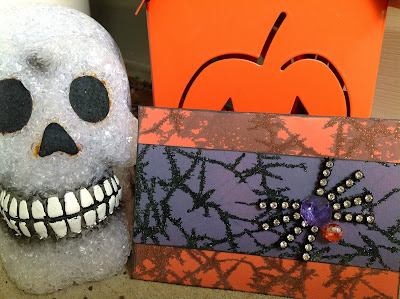
Itsy Blingy Spider Card with Connie Crystal

The Itsy Blingy Spider
I had a spooky good time creating this fun Halloween card with great glittery papers from The Robin's Nest and Connie Crystal elements.
Materials:
Connie Crystal black crystal sheet (www.wegotcrystal.com)
Connie Crystal 5/8" purple octagon crystal
Connie Crystal 5/16" orange crystal bead
The Robin's Nest Orange Glitter Crackle & Purple Glitter Crackle paper (www.robinsnest-scrap.com)
Clearsnap® ColorBox® Cat's Eye® Queue "Funky" inkpad - Pepper
Beacon Adhesive's ZipDry™ adhesive and Dazzle-Tac Jewelry Glue™(www.beaconadhesives.com)
Westcott paper trimmer & scissors (www.westcottbrand.com)
Happy Halloween rubber stamp
Orange cardstock
Instructions:
Cut orange glitter cardstock to 5" x 7," fold in half to create card.
Cut one piece purple glitter cardstock to 2" x 5" and one to 1 1/2" x 5".
Ink edges of card and purple pieces with Pepper pigment inkpad.
Ink Happy Halloween stamp with Pepper inkpad and stamp onto scrap orange cardstock. Trim around verse. Ink edges of verse with Pepper inkpad.
Use Zip-Dry adhesive to mount smaller strip of purple glitter cardstock inside card. Mount Happy Halloween centered on purple paper.
Use fingertip and Pepper inkpad to gently smudge ink over solid surface of inside card and over verse.
Mount larger strip of purple paper to center of front of card.
Use Dazzle-Tac adhesive to mount purple crystal to right side of purple strip of front of card, approximately 1 1/2" from edge.
Mount orange crystal adjacent to purple crystal to create head of spider.
Cut 8 pieces of black crystal sheet to 4 crystal strips. Mount 4 on each side of purple crystal to create spider legs.
HAPPY HALLOWEEN TO ALL!!! - Cindi


Comments
Post a Comment