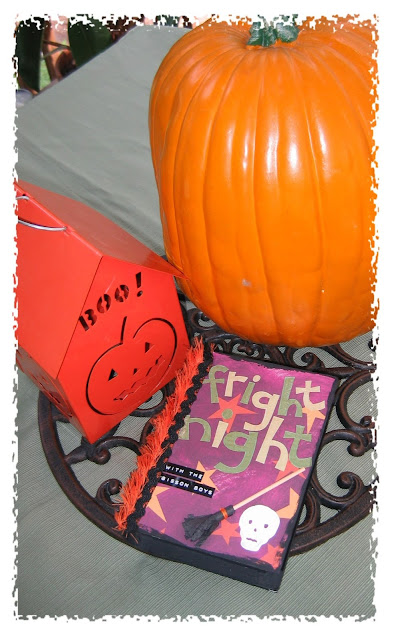
Fright Night Halloween Photo Book
 This spooky little project, a “Fright Night” Halloween Photo Book, is something I whipped up a while ago, but I thought it would be fun to share it with our WCK viewers.
Fright Night is a book box featuring Halloween photos of our boys as they’ve grown. The photos are mounted on a metal ring to make it simple to add photos in the coming years. The boys just love taking out their Fright Night book and laughing at their costumes throughout the years!
Supplies:
- Chipboard book box (The Craft Pedlar)
- Halloween patterned papers (Reminisce used on this project)
- Metal key ring
- Assorted fringe, ribbon and twills
- “Jiggle eye” embellishments
- Assorted Halloween foam stamps
- Jolee’s Boutique Halloween themed embellishments
- Plaid Industries white and black acrylic paints
- Dymo label maker & black label tape
- Clearsnap Ancient Page Earthworks PetalPoint inkpad
- Ranger Inkssentials Crackle Accents
- Craft Bond Adhesive (Elmer’s)
- Westcott Trim Air Paper trimmer
- Westcott scissors
- Crop-A-Dile punch (We R Memory Keepers)
Instructions:
- Measure front and back covers of chipboard book box. I chose patterned paper with text – and cut my cover paper so the title “fright night” was positioned as desired. A title could also be stamped, die cut, etc. Cut paper for back cover. Mount to front and back covers of box.
- Apply white acrylic paint to skull stamp, stamp into lower left corner of front cover.
- Mount Jolee’s witch’s broom embellishment at an angle over stamped skull.
- Paint all uncovered sides and inside of box with black acrylic paint. Dry brush small amount along front and back cover edges. Let dry.
- Measure and cut pieces of decorative trims for left edge of cover. Mount as desired. (For this project I layered black ric-rac over black & orange fringe.)
- Apply Ranger Crackle Accents over title lettering. Let dry.
- Spell out remaining text using Dymo label maker and black label tape. Apply to cover as desired.
- Print photos to fit on 3 ½ x 5” pieces of paper/cardstock. (Multiple smaller photos can be arranged on one piece, or a single 3 ½ x 5” photo could be used as the page itself.)
- Measure and cut 3 ¾ x 5 ¼” mats from assorted coordinating cardstocks and patterned papers.
- Ink edges of all photos and mats using Chocolate Ancient Page ink.
- Arrange photos on mats as desired and mount.
- Use assorted foam stamps and white acrylic paint and assorted Jolee’s embellishments to accent photo pages
- Print text as desired using Dymo label maker, add to photo pages.
- Select patterned paper for cover of flip book. Cut to 3 ¾” x 5 ¼”. As in the cover of the book, I chose a piece which said “boo” and cut it accordingly.
- Measure and cut trims for top and bottom of cover page. Mount.
- Add “jiggle eyes,” Jolee’s embellishment and Dymo label text as shown.
- Apply Ranger Crackle Accents over “boo” on paper – let dry.
- Use Crop-A-Dile punch (or small hole punch) to punch hole in desired corner of all pages of mini flip book.
- Use metal key ring to bind pages. Add assorted ribbons/twills to key ring.
- Finished book can be stored inside your Fright Night chipboard box for years of spooky memories!


Comments
Post a Comment